Crafting Effective How-To Guides

Table of Content.
-
Understanding Client Needs
-
Structuring Your Guide
-
Writing Clear Instructions
-
Incorporating Visuals
-
Testing Your Guide
-
Publishing and Distribution
-
Gathering Feedback for Improvement
Understanding Client Needs
When creating how-to guides for clients, the first step is understanding what they truly need. Every client is different, so it's crucial to spend time learning about their specific goals. Start by asking them detailed questions about what they want to achieve. For example, if they want to build a DIY small biz website, ask about their target audience and the kind of features they need.
Listen carefully to their responses to ensure you get the full picture. It's helpful to take notes during these conversations to capture all the details. You might also look into any existing materials they have, such as websites or marketing content, to better grasp their style and message. By doing this, you can create a guide that truly speaks to their needs and expectations.
Think of this step as setting the foundation for your entire project. Once you know what the client wants, you can tailor your how-to guide to meet those needs effectively. This approach not only makes your guide more useful but also strengthens your relationship with the client.
Structuring Your Guide
Creating a well-structured guide is like building a house; you need a solid foundation. Start with an introduction that clearly states the purpose of the guide. This gives readers a sense of direction. Break down the guide into sections and use headings to organize the content. Each section should focus on one main idea for clarity.
Use bullet points or numbered lists to highlight steps or important points. This makes it easier for readers to follow along. Including examples can help clarify complex ideas. For instance, if you're explaining how to use basic HTML/CSS, showing a simple code snippet can be helpful. Use images or diagrams to illustrate steps. This visual aid can be particularly useful in a WordPress tutorial, where seeing the dashboard might make things clearer.
End each section with a brief summary or key takeaway. This helps reinforce what the reader has learned. Using simple language ensures everyone, even those with basic English skills, can understand. Always keep your audience in mind and adjust the complexity of the content accordingly.

Writing Clear Instructions
Creating how-to guides for clients can be a breeze if you focus on writing clear instructions. Start by imagining you're explaining the process to a friend who's new to the topic. Use simple words and short sentences to keep things straightforward. Avoid jargon unless you're sure the reader will understand it.
Break down each step into small parts. For example, if you're explaining how to log in to a website, guide the reader through opening the browser, typing the URL, and entering login credentials. Adding illustrations, like screenshots or diagrams, can help make complex steps easier to follow.
It's important to maintain a logical flow. Each step should naturally lead to the next. If a step has multiple actions, list them clearly. This helps readers follow along without feeling overwhelmed.
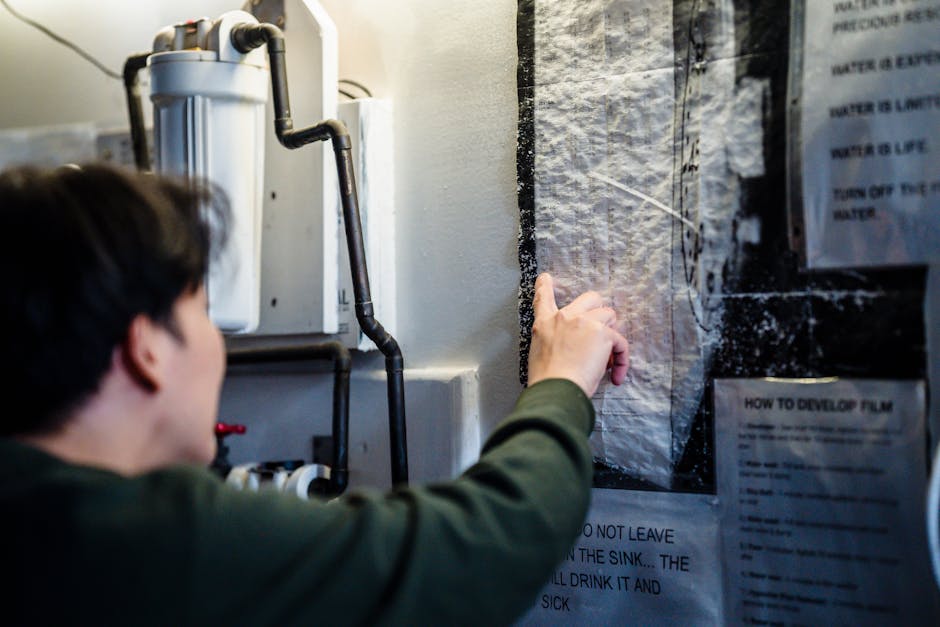
Incorporating Visuals
Using visuals in your how-to guides is like adding spice to a dish. It makes the content more engaging and helps your clients understand the steps better. When you include images or diagrams, you're giving your readers a visual reference. This can make complicated instructions easier to grasp. Let's break down how you can effectively incorporate visuals into your guides.
First, think about the kind of visuals that will best support your guide. Screenshots are great for tech-related guides, especially when explaining software or digital tools. They provide a step-by-step look at what the client should see on their screen. For instance, if you're building a guide on creating a DIY small biz website with WordPress, a screenshot showing the login page or dashboard can be very helpful.
Next, consider diagrams or flowcharts for processes that involve multiple steps or decisions. A flowchart can simplify a complex process by showing how one step leads to another. This is particularly useful for guides that explain processes like setting up a basic HTML/CSS framework. By providing a visual roadmap, you're helping clients see the entire process at a glance.
Photographs are another type of visual you might use, especially for hands-on tasks. If your guide involves physical products or tools, showing real photos can clarify what items or outcomes should look like. This is useful for guides related to physical products or tangible outcomes.
When you choose visuals, ensure they are clear and high-quality. Blurry or confusing images can lead to misunderstandings. It's also important to label images clearly. A caption or title can tell clients exactly what part of the process the image refers to.
Placement of visuals is crucial. Insert them close to the relevant text, so readers don't have to scroll back and forth. This keeps the guide flowing naturally and maintains the reader's focus.
Finally, consider adding annotations or callouts to your visuals. These are small notes or highlights that draw attention to important details. For example, if you're showing a screenshot of a website's admin panel, you could circle or highlight the button to click next. This directs the reader's attention precisely where it needs to be.
By thoughtfully incorporating visuals, you transform a simple how-to guide into an interactive and user-friendly experience. Visuals not only enhance understanding but also keep your readers engaged. Whether they're building a website or learning a new software, visuals act as a bridge between written instructions and real-world application.

Testing Your Guide
Testing a how-to guide is like taking a new car for a spin. You want to make sure everything runs smoothly before handing the keys to someone else. Start by going through the guide yourself. Follow each step exactly as you’ve written it. This helps you catch any vague instructions or missing details. If you trip over an explanation, it's likely others will too.
Next, bring in a fresh pair of eyes. Ask someone who hasn't seen your guide to try it out. Choose a person similar to your guide's intended audience. For example, if your guide is for beginners, find someone new to the topic. Watch them as they follow the instructions. Make notes on where they hesitate or get confused. This firsthand feedback is invaluable. It shows you where the guide may need tweaks or extra explanations.
Encourage testers to think aloud. If they say, "I don't get this part," that's your cue to clarify. Sometimes, what makes perfect sense to you might be a head-scratcher for others. Testing like this helps ensure your guide is clear and user-friendly.
Finally, consider conducting a group test if possible. Gather a few people to go through the guide together. They can discuss each step, share thoughts, and help identify any tricky spots. This collaborative approach often uncovers issues you might miss on your own.
Testing transforms your guide from a rough draft into a polished resource. By putting in the effort to test thoroughly, you make sure your guide truly serves its purpose. People will appreciate the clarity and ease of use, and you'll gain confidence knowing you've created something helpful and effective.

Publishing and Distribution
Let's chat about getting your how-to guide out into the world. You've put in the hard work creating it, and now it's time to share it with your audience. Publishing and distribution are key steps to ensure your guide reaches the right people and serves its intended purpose.
First, think about the format. Will your guide be a PDF, an online article, or maybe even a video? The format can influence how you distribute it. For instance, PDFs work well for email distribution, while videos are great for social media or YouTube.
Next, consider your audience. Are they on LinkedIn, Facebook, or perhaps they prefer receiving information via email? This will help you decide the best platforms for distribution. If your clients are professionals, LinkedIn might be the best bet. For a younger audience, Instagram or TikTok could be more effective.
Now, let's talk platforms. If you're going for an online article, platforms like Medium or your own blog can be ideal. They allow you to reach a wide audience and engage with readers through comments and shares. For email, tools like Mailchimp or Constant Contact can help you send your guide directly to your clients' inboxes.
Social media is another powerful tool. Share snippets of your guide on platforms like Twitter, Facebook, or Instagram to attract attention and drive traffic to the full guide. Use hashtags relevant to your industry to reach a broader audience.
And don't forget about SEO. If your guide is online, optimizing it for search engines can increase visibility. Use relevant keywords and ensure your content is easy to read and navigate. This will help more people find your guide through search engines like Google.
Finally, consider partnerships. Collaborate with influencers or other businesses in your field. They can share your guide with their audience, expanding your reach. This is especially useful if you're targeting a niche market.
Publishing and distribution might seem overwhelming, but with a clear plan, it's manageable. Focus on your audience, choose the right platforms, and use SEO strategies to ensure your guide gets the attention it deserves.
Gathering Feedback for Improvement
Creating a how-to guide is just the beginning. To make your guides better, you need feedback from those who use them. This step can transform a good guide into a great one. Let's explore how you can gather and use feedback effectively.
Start by reaching out to your clients and asking for their opinions. They are the ones who will use your guide, so their insights are valuable. You can send them a short survey with specific questions. For example, ask if the instructions were clear or if any steps were missing. This will help you pinpoint areas that need improvement.
Another way to gather feedback is by setting up a feedback form on your website. This can be a simple contact form where users can type their thoughts. Make sure the form is easy to find and use, so clients feel encouraged to share their experiences.
After collecting feedback, analyze it to identify common themes. Maybe multiple clients mention the same issue, such as unclear instructions in a specific section. This is a clear sign that changes are needed. Use this information to update your guide, making it more user-friendly.
Sometimes, feedback can be negative. Don't take it personally. Instead, see it as an opportunity to improve. Address the concerns raised and make the necessary adjustments. This shows your clients that you value their input and are committed to providing a high-quality guide.
Consider hosting a webinar or a Q&A session where clients can discuss the guide directly with you. This interactive approach allows you to address questions in real-time. It also builds trust and strengthens your relationship with clients.
Finally, keep track of the changes you make based on feedback. This helps you see how your guide evolves over time. It also provides a record of what clients find useful, guiding future projects. Feedback is not just about fixing problems; it's about continuous improvement and delivering value to your clients.
FAQ
How do I identify the specific needs of my clients for a how-to guide?
To identify your clients' needs, conduct surveys, interviews, or focus groups to gather insights into their challenges and expectations. Analyze existing data and feedback to tailor your guide to address their specific issues effectively.
What is the best way to structure a how-to guide for optimal readability?
Organize your guide with a clear introduction, followed by step-by-step instructions. Use headings, subheadings, and bullet points to break down information into digestible sections, enhancing readability and user experience.
How can I ensure my instructions are clear and easy to follow?
Use simple and direct language, avoiding jargon and complex terms. Write in short sentences and provide examples where necessary. Consistently use the same terms throughout to avoid confusion.
Why are visuals important in a how-to guide, and how should I use them?
Visuals such as images, diagrams, and videos help reinforce text, making instructions more understandable. Use them to illustrate complex steps, and ensure they are high quality and relevant to the content.
What steps should I take to test my how-to guide effectively?
Test your guide with a sample of your target audience. Observe their interactions, collect feedback on clarity and usability, and make adjustments based on their input to ensure the guide meets their needs.
Where should I publish my how-to guide to reach my target audience?
Choose platforms your audience frequents, such as your website, social media, or email newsletters. Consider creating downloadable PDFs or hosting guides on platforms like YouTube if your audience prefers video content.
How can I gather feedback to improve my how-to guides post-distribution?
Encourage feedback through surveys, comment sections, or direct communication channels. Analyze the feedback to identify common issues or suggestions and use this information to refine and improve future guides.